Use APKPure App
Get Cute 3D Cupcake Nail Art old version APK for Android
Get Inspired With Cute 3D Cupcake Nail Art, Easy And Cheap To Create
Cute 3D Cupcake Nail Art Even Ladies Want
Taste This Delish 3D Cupcake Nail Art
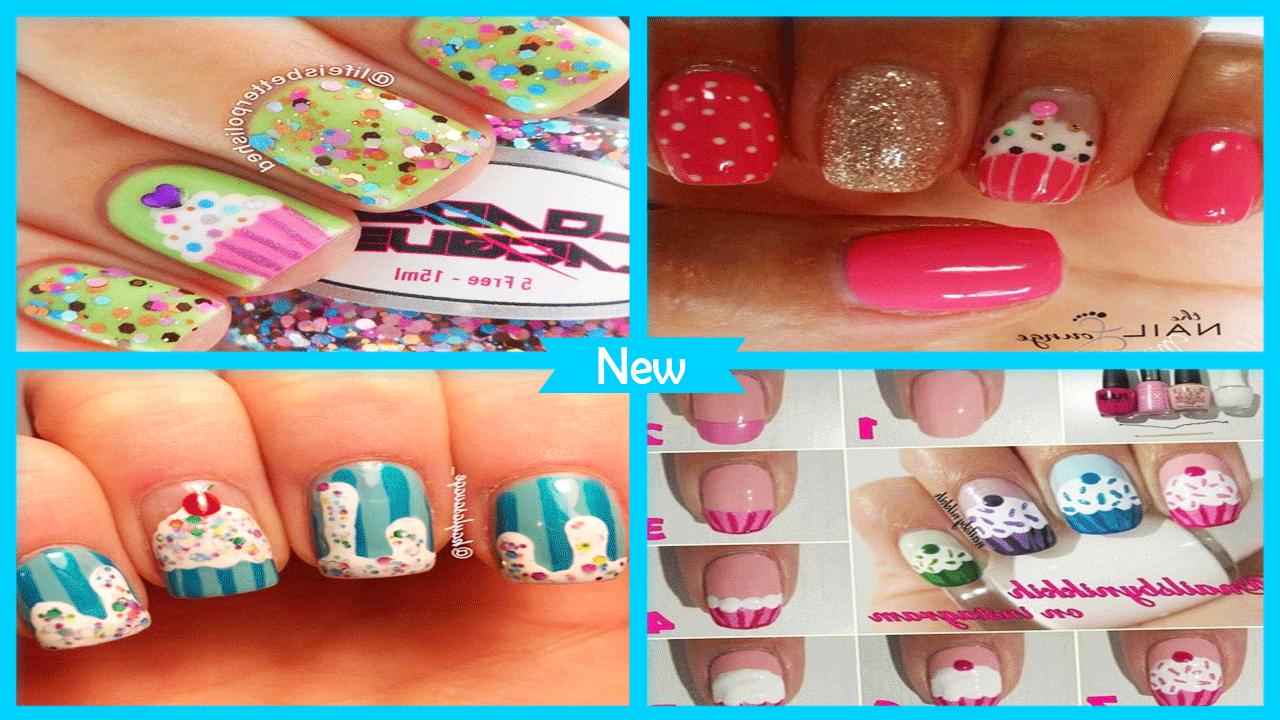
Who isn’t crazy about 3D cupcake nail art? I mean, seriously! It’s one of the cutest nail art ever, and it knows no age. This is absolutely a favorite among many regardless of whether they’re in their teens or say, late 40s. I should know because I’ve had the chance to paint them on my customers’ nails coming from a wide range of age groups. It’s only fitting to share with you a tutorial of the ever yummy 3D cupcake nail art so you can only recreate it in the comfort of your homes.
Ready to bake your own 3D cupcake nail art? Follow these super easy steps to create this fab and yummy 3D cupcake nail art:
Step 1: Apply base coat
Never forget to protect your nails with a base coat. For this design, Nutra Nail Green Tea Nail Strengthener was used to shield the nails from chipping or breaking. A nail design, no matter how gorgeous, is still nothing if your nails are not healthy enough.
Step 2: Paint base color
Paint the nails with a muted green polish as the base color.
Step 3: Place purple French tip
Create a French tip using a light purple nail polish. Do the same thing to rest of your fingers except for the index finger. For the last one, create a French tip by applying the yellow nail polish.
Step 4: Make a thin line
Use a thin brush to line the edge of the French tip you just did. On top of the black line, swipe over it the silver nail polish to add more detail to your 3D cupcake nail art. The silver polish need not really be apparent. It just has to give a hint of glow.
Step 5: Add 5 dots
It’s now time to focus on the cupcake. Create five medium sized dots using your biggest dotting tool. Place two on top and three dots just below the first two. Don’t worry if the dots seem to mix together. This is how things should go.
Step 6: Create cupcake design
Use a detail brush to draw the bottom half of the cupcake. First, make a square using nail polish. This is the base of your 3D cupcake nail art. Add the details to it. Simply draw three black lines to mimic the look of the liner.
Step 7: Draw heart and add micro beads
It’s time to bring in the details of the 3D cupcake nail art. Draw a heart just at the center of the black and silver line earlier drawn. Start with a V shape and widen it to form a heart shape. Add in some colorful micro beads. This will resemble the sprinkles. To pick up beads, just dab a little clear polish and dip the tip of the dotting tool to get the beads out.
Step 8: Finish with top coat
Once you’re done, add a layer of top coat to seal your design. This will protect all your hard work from getting chipped. It will also make the design look shinier.
for further information and detail tutorial, download this now and grab what you want.
please enjoy this Cute 3D Cupcake Nail Art and give us any feedback.
Last updated on Feb 5, 2018
No 1 App For Cute 3D Cupcake Nail Art in Play Store
Feature List:
✓ Amazing 3+ Cute 3D Cupcake Nail Art.
✓ Lots of perfect 3+ Cute 3D Cupcake Nail Art in HD Quality.
✓ You can share all tutorial to social media and other
✓ You can add Cute 3D Cupcake Nail Art into favorite list
✓ Zoom in, zoom out for all tutorial.
✓ Application easy to use, works offline. No need to download content.
Latest Version
![]() 7.1
7.1
Uploaded by
Kyaw Kyaw
Requires Android
Android 4.0+
Category
Report


Discover what you want easier, faster and safer.

Cute 3D Cupcake Nail Art
7.1 by Romulus Appss
Feb 5, 2018